

The Apple Watch has been out for a while now, but there is a huge wave of new Apple Watch owners, thanks to the Christmas season. For those whoa re new to using the Apple Watch (and even those who are more seasoned), this post is for you!
I’ve been using the Apple Watch since Day 1, and love it! It’s great for exercise, relaxing, checking social media, texting… even controlling your Apple TV! In this post, I will go through my top 10 Apple Watch tips. Here we go!
Tip #1: Adjusting Notifications
If your new to using Apple Watch, you are probably going a little crazy at the amount of buzzing that it generates. This is because all notifications are turned on by default. If you can stand it, it may be a good idea to leave these notifications on for 2 - 3 days. Doing this will give you a good idea of what will, and will not, notify you. After that, you may want to turn things down a notch or two. These notifications can’t (at least not right now) be adjusted on the Apple Watch itself. Instead, we will need to use the iPhone that your Apple Watch is paired to. To adjust notification settings, we’ll need to open the Apple Watch app, then navigate to Notifications. Your screen will look something like this:
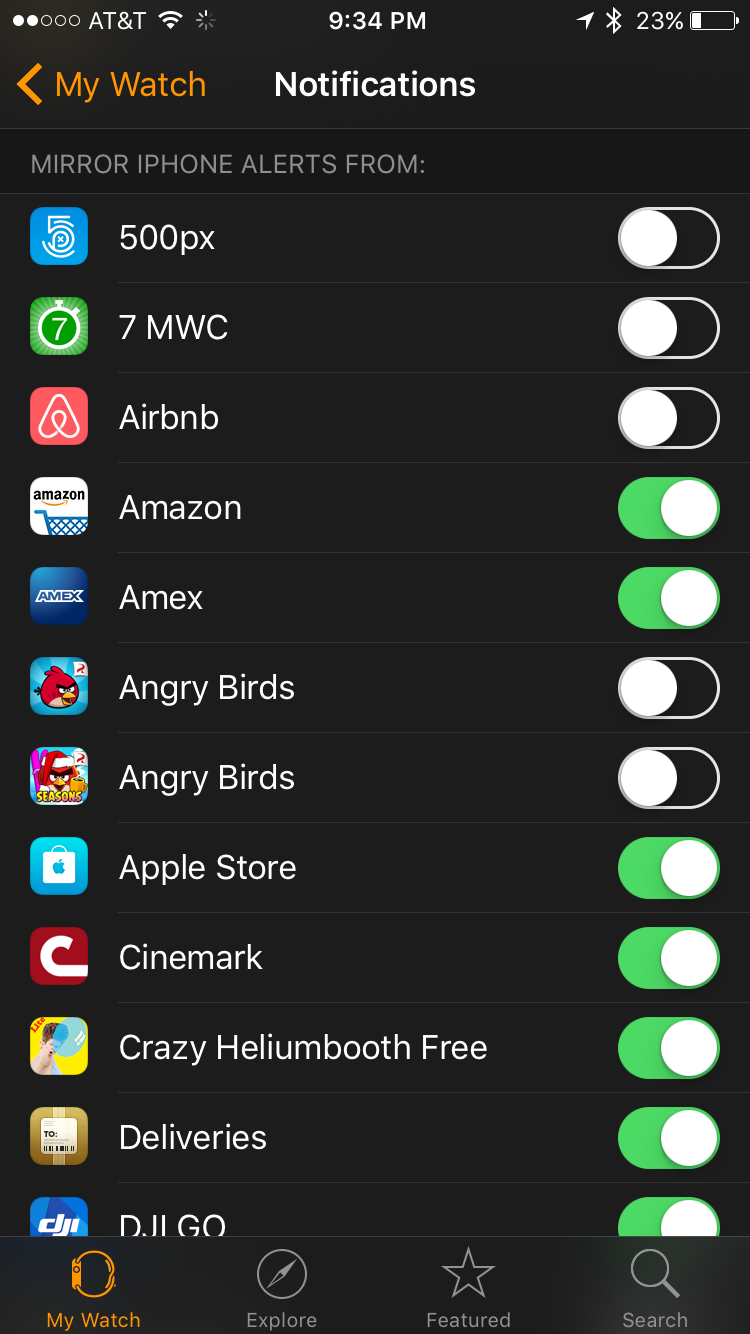
From here, you can disable or enable the notifications that make sense to you.
Tip #2: Add Your Closest Friends to Your Digital Touch Circle
Digital Touch is pretty slick! It’s a quick way to stay in touch with 12 f your closest friends, colleagues or family members. Simply tap the side button (not to be confused with the Digital Crown) one time, and a list of your 12 friends will appear.

From here, you can initiate a phone call, text or even send them a Digital Touch message (the recipient needs to also have an Apple Watch for Digital Touch messages). To add or remove friends from your circle, all we need to go is use the Digital Crown to rotate the selection to a blank space, then tap the [+] in the center of the display.

From here, you will be prompted to choose a friend from your list of contacts.
Tip #3: Strengthen the Taptic Feedback
Out of the box, the haptic feedback (a.k.a.: the buzzing) may seem to be a little lite for some wearers, including me. I like it to be a bit stronger. Apple allows 3 strengths for you to choose from, and you can make the change at any time. To change your haptic strength, you’ll need to first open the Apple Watch app on your iPhone. Next, tap on “Sounds & Haptics”.

There are lots of options here, but then you’re looking for is “Haptic Strength”. As you adjust the strength, you will feel a sample tap on your wrist, so pay attention!
Tip #4: Sync Photos
While storage will limit the number of photos we can sync to our Apple Watch, we are able to sync some… up to 500 (for now). This is a great way to carry photos of your family or other important parts of your life right no your wrist, ready to show off at any time!
To sync photos to your Apple Watch, let’s head over to the Apple Watch app on your iPhone. Next, we’ll navigate to the “Photos" option.

Under the “Photo Syncing” section, tap on the “Synced Album” option to select a photo album within Photos on your iPhone to sync to your Apple Watch. That’s it! Give it a few minutes to sync your photos (depending on how many you are syncing), and you can then open the Photos app on your Apple Watch to view them.
Tip #5: Take a Screenshot of Your Apple Watch
Hopefully by now, you know how to take a screenshot on your iPhone. If not, press the Home and Power buttons simultaneously for just a second. You will see your screen flash and hear a shutter sound. Your new picture will automatically be saved in your Photos app under the “All Photos” and “Screenshots” albums.
Taking a screenshot on your Apple Watch is just as easy and just as useful. To take a screenshot on your Apple Watch, press the Digital Crown and Side Button at the same time. Just like the iPhone, you will see the screen flash. Net, you can access your new screenshot back on your iPhone under the same “All Photos” and “Screenshots” albums.
Tip #6: Enable/Disable Airplane Mode
In some cases, it may be a good idea to enable Airplane mode, just like you can on your iPhone. There are two ways of doing this. Method 1: enable Airplane mode on your iPhone. When you do this, it sends a signal to your Apple Watch and automatically invokes Airplane mode on your Apple Watch. One caveat to this… when you disable Airplane mode on your iPhone, you will need to manually disable Airplane mode on your Apple Watch. If you think about it, this makes sense. How will your Apple Watch know to disable Airplane mode if it can’t connect to your iPhone, right? Method 2: swipte up from the bottom of your Apple Watch to reveal your glances. The first glance is the connection status,

By tapping the left-most button, this will enable Airplane mode. As with method 1, this will also enable Airplane mode for your iPhone. When it’s time to disable Airplane mode, you will need to manually disable it on both devices.
Tip #7: Using Apple Pay
Using Apple Pay is incredibly awesome and useful! If you have an Apple Pay-friendly iPhone (iPhone 6 or later) or Apple Watch. It’s seriously fast and always generates a “Wow, cool!” response from others in line behind you.
Before we can use Apple Pay on our Apple Watch, we ned to first set it up on our iPhone. To do this, we’ll need to go to Settings > Wallet & Apple Pay. From here, all we need to do is tap on “Add Credit or Debit Card” and follow the instructions. At the end of the setup process, we will be asked if we want to also use the same card for transactions on our Apple Watch. If you choose in the affirmative, the right information will be securely sent to your Apple Watch.
When you’re ready to use Apple Pay, simply press the Side Button two times, and your default credit card will be displayed.

If you have more than one card setup, you can choose between the two cards by swiping left or right, then holding your Apple Watch to the payment sensor.
Tip #8: Customizing Complications
The Apple Watch comes with about a dozen complications (or watch faces) to choose from. Some are more customizable than others, and it’s worth playing with all of them to find the one that you like the best. To test drive different complications, press firmly on your current complication. Next, you can swipe left and right to find the complication you want to test out.
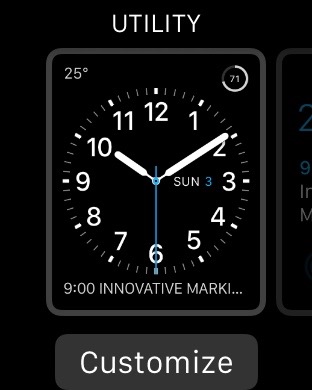
To customize your new complication, tap the “Customize” button below the complication. This will take us to a new view where we can now swipe left/right to customize various components of our complication.

To make changes to a component, just rotate the Digital Crown.When your’e done customizing, firmly press on the complication again, and you will be taken to the previous menu.
Tip #9: Use the Apple Watch To Take Photos on Your iPhone
The iPhone has a great camera! Sometimes, however, it’s not easy to take a picture of a scene, especially when it’s in a hard-to-reach spot or you’re in the photo. Sure, the iPhone Camera app has a handy time-release shutter option, but it’s only good for either 3 or 10 seconds. The Apple watch has a really sick app called Camera, and guess what it does? No, it doesn’t allow you to take pictures using a camera built-in to the Apple Watch (it would need a camera for that), but it does act as a remote shutter release for your iPhone’s camera app!

To use this handy feature, we would first want to place the iPhone into position. Next, we open the Apple Watch Camera app. If the iPhone’s Camea app isn’t already open, it will open automatically when we launch the Apple Watch Camera app. The next thing we see is a live preview of what the iPhone sees.

There are 2 ways to take a picture now. The first is instantly. We can take a picture of that very moment by either pressing the round shutter button in the lower middle part of the app, or by pressing the Side Button. If we want to avoid the “Hey, wy are you looking at your Apple Watch when you took the picture” questions, you can use the 3-second timer button located to the right of the shutter. This will give you a 3-second warning by flashing the Led flash, then take a series of 10 photos in burst mode. Burst mode will help you catch everyone with their eyes open.
Tip #10: Read the Official Apple Watch User Guide
I know this sounds like a cop-out, but it really isn’t. It’s amazing how many cool and interesting things I have learned by simply reading (or even skimming) Apple’s official Apple watch User Guide. You can access this document from here: Apple Watch user Guide.


